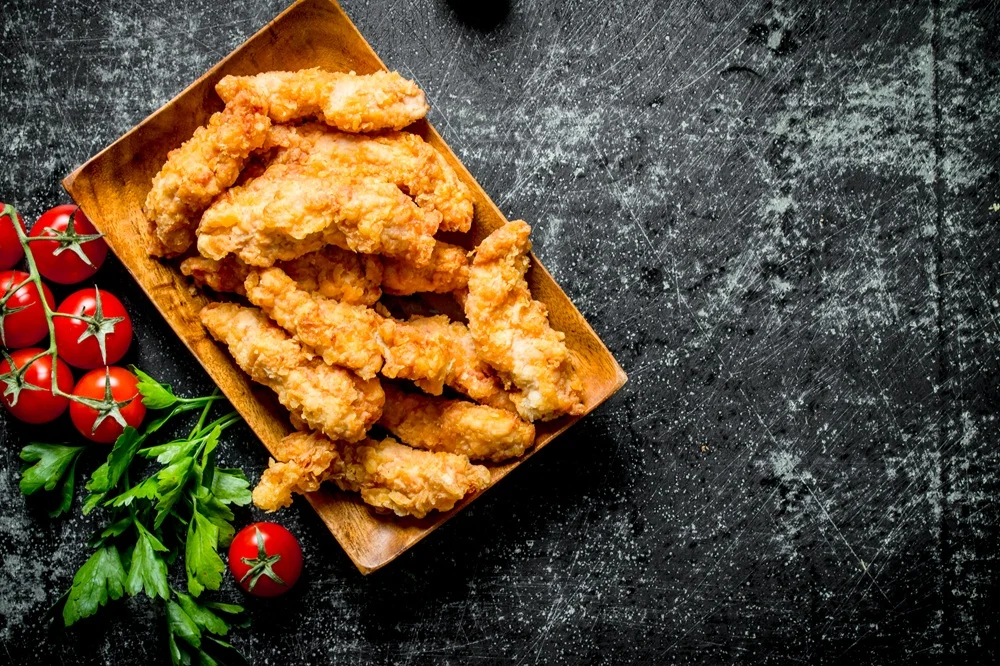
Chicken tenders whether you call them strips, fingers, or just good ol’ chicken have a timeless charm. The golden crispy coating, the juicy, tender meat inside… it’s a comfort food that feels like a warm hug. As much as chicken tenders have become a staple in the world of family dinners and quick weeknight meals, there’s a lot more heart in them than you might think. This recipe isn’t just about making a meal. It’s about recreating those moments where the smell of frying chicken fills the air, and every bite takes you back to the joy of sharing simple, flavorful food with the ones you love.
Why I Love This Recipe?
There’s something magical about a homemade chicken tender. I’m sure you’ve had your fair share of frozen ones, or the ones from your local fast food joint. But when you make them yourself, that’s when the true magic happens. It’s not just about the crunch—it’s the way the chicken is perfectly juicy inside, every bite tender and satisfying. You get to control the seasoning, the breading, and the cooking method. It’s personal.
But beyond the taste, chicken tenders hold a deeper connection for me. I think back to when I was little, sitting around the dinner table, my mom’s kitchen smelling like warmth and happiness. Chicken tenders were one of her signature dishes, and though the recipe might’ve evolved a bit over the years, it’s still the one I crave. I can almost feel the warmth of the kitchen around me, the sound of sizzling oil, and that deep sense of contentment you get from sharing a meal with loved ones. That’s what makes these chicken tenders so special—not just the flavor, but the memories they evoke.

Chicken Tenders Recipe
Equipment
- Large mixing bowls
- Shallow dish
- Frying pan or deep fryer
- Tongs
- Paper Towels
- Cooking thermometer
- Serving platter or plate
Ingredients
- 4 boneless skinless chicken breasts
- 1 cup all-purpose flour
- 1 teaspoon garlic powder
- 1 teaspoon onion powder
- 1 teaspoon smoked paprika
- Salt and pepper
- 2 large eggs
- 2 cups breadcrumbs
- 1 cup buttermilk
- Vegetable oil
Instructions
- Prepare the chicken: Cut the chicken breasts into strips, about 1 inch wide. Season with a pinch of salt and pepper.
- Set up your breading stations: In a shallow dish, combine the flour, garlic powder, onion powder, smoked paprika, salt, and pepper. In another shallow dish, whisk the eggs and buttermilk together. In a third dish, place the breadcrumbs.
- Coat the chicken: Dip each chicken strip first into the flour mixture, then the egg wash, and finally coat it in the breadcrumbs. Make sure the chicken is well-coated at each stage.
- Heat the oil: Heat about 1-2 inches of vegetable oil in a large frying pan over medium heat. Use a thermometer to ensure the oil reaches around 350°F (175°C).
- Fry the chicken: Carefully add the chicken tenders to the hot oil in batches. Do not overcrowd the pan. Fry for 3-4 minutes on each side, or until the tenders are golden brown and reach an internal temperature of 165°F (74°C).
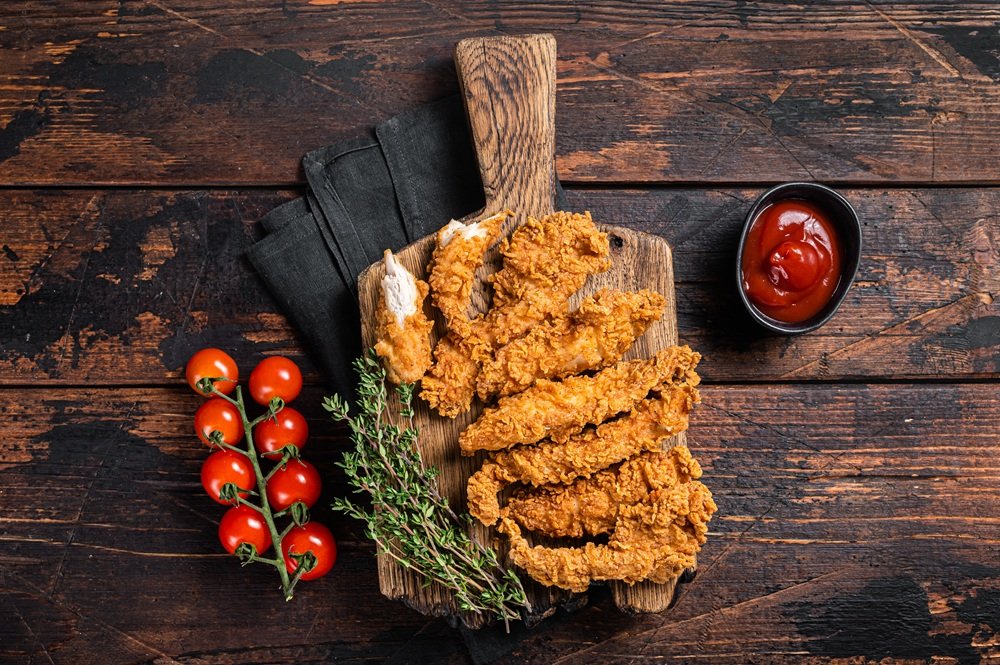
- Drain and serve: Use tongs to remove the tenders from the oil and place them on a plate lined with paper towels to absorb any excess oil. Serve hot with your favorite dipping sauce.
Related Video
Notes
- Temperature Control is Key: Make sure your oil is at the right temperature (350°F/175°C) before frying. If it’s too low, your tenders will become soggy; too high, and they may burn.
- Double Coating for Extra Crunch: For extra crispy tenders, dip the chicken in the flour and egg mixture twice, then coat again in breadcrumbs. This creates a thicker crust that crisps up beautifully.
- Rest After Frying: Let your tenders rest on a paper towel-lined plate for a minute or two after frying to ensure they stay crispy and to drain excess oil.
- Use Panko Breadcrumbs: For the crispiest texture, use panko breadcrumbs instead of regular ones. They provide a lighter, airier crunch that makes a big difference.
- Season as You Go: Don’t forget to season the chicken itself, not just the breading. A pinch of salt and pepper on the raw chicken will enhance the flavor from the inside out.
Nutrition
Serving Suggestions For Chicken Tenders
Before diving into variations and storage tips, let’s talk about how to serve these crispy chicken tenders. There’s no shortage of ways to make them shine, whether you’re looking for something classic or a bit more creative. Here are a few ideas to elevate your meal:
- With Fries and Coleslaw
A classic pairing that never goes out of style. Imagine crispy tenders stacked alongside golden fries, with a side of tangy coleslaw. The creamy crunch of the coleslaw pairs so beautifully with the warmth and crispy texture of the tenders. I can almost hear the crunch of the first bite—it’s one of those satisfying combos that’s impossible to resist. - On a Salad
Feeling a bit lighter? Serve your chicken tenders over a bed of mixed greens with a creamy dressing like ranch or a tangy vinaigrette. The hot, crispy tenders paired with the cool crunch of fresh vegetables is a perfect balance. This one’s great for when you want comfort food but with a little healthier twist. - In a Wrap or Sandwich
Whether in a tortilla wrap or between slices of toasted bread, chicken tenders make for an unbeatable sandwich filling. Add some pickles, lettuce, tomato, and your favorite sauce—my go-to is spicy mayo—and you’ve got a meal that’s great for lunch or dinner. - With Mac and Cheese
I don’t think there’s a better side dish for chicken tenders than a bowl of creamy mac and cheese. The rich, velvety cheese sauce is the perfect complement to the crispy coating of the chicken. It’s comfort food at its finest. For me, this combo always takes me back to childhood family dinners and big get-togethers.
No matter which way you serve them, chicken tenders always bring people together. The best part? They’re endlessly customizable based on your mood and your cravings.
Try this also : Authentic Pollo Asado Recipe
Variations Of Chicken Tenders
While the classic crispy chicken tender is hard to beat, sometimes it’s fun to shake things up a little. Here are a few variations I’ve tried and loved over the years—each one offering a unique twist on a beloved dish.
- Spicy Buffalo Tenders
For those of us who love a little heat, adding buffalo sauce to your chicken tenders is a game-changer. Once your tenders are fried and crispy, toss them in a bowl with a mix of hot sauce and melted butter. The spicy, tangy coating gives them a kick that pairs perfectly with a cooling ranch or blue cheese dip. It’s the perfect way to take your chicken tenders to the next level. - Honey Mustard-Coated Tenders
If you’re a fan of sweet and savory flavors, honey mustard is your new best friend. A simple glaze made of honey, Dijon mustard, and a touch of vinegar gives the tenders a sweet yet tangy coating that’s irresistible. I love serving these with a side of sweet potato fries for a combo that feels a little gourmet yet still comfort-food delicious. - Parmesan-Crusted Tenders
If you’re after a more sophisticated, Italian-inspired twist, try coating your chicken tenders in a mixture of breadcrumbs and grated Parmesan. The cheese gives the tenders a savory depth of flavor and a little extra crunch. For a complete meal, serve them with marinara sauce for dipping and a side of spaghetti for an Italian feast. - Lemon and Herb Tenders
For a lighter, refreshing take on chicken tenders, try adding lemon zest and fresh herbs like thyme or rosemary to your breadcrumb mixture. The citrusy zing and the fragrant herbs give the tenders a beautiful, fresh flavor that’s perfect for spring or summer meals. Pair them with a side of roasted vegetables, and you’ve got a dish that’s bursting with flavor and brightness.
Whether you like them spicy, sweet, or a little more savory, these variations let you experiment and make the dish your own. The possibilities are endless!
Storage and Shelf Life Of Chicken Tenders
Chicken tenders are a great dish for meal prepping or making ahead. If you have leftovers (which, let’s be honest, might not happen if you have a crowd), here’s how to store them properly to ensure they stay delicious:
- Refrigeration
Store cooked chicken tenders in an airtight container in the fridge. They’ll stay fresh for about 3-4 days. Make sure to let them cool completely before storing them so they don’t sweat and become soggy. - Freezing
If you want to keep your chicken tenders for a bit longer, freezing is a great option. Lay the tenders out on a baking sheet and freeze them in a single layer before transferring them to a freezer-safe bag or container. This way, they won’t stick together, and you can pull out just what you need. They’ll stay good for up to 2 months in the freezer. - Reheating
To reheat, I recommend baking them in the oven for a few minutes at 400°F (200°C) to get that crispy texture back. You can also use an air fryer for a quick and easy option, especially if you want to avoid a soggy result.
Whether you’re storing your chicken tenders for later or just trying to extend their deliciousness, proper storage is key to keeping them crispy and flavorful. With these simple tips for refrigeration, freezing, and reheating, you can enjoy your tenders even after the initial meal. Just be sure to follow the steps and you’ll always have a tasty, easy meal ready to go!
Health Benefits Of Chicken Tenders
While chicken tenders are definitely comfort food, they can also fit into a balanced diet when made with care. Here are a few reasons why they’re more than just a treat:
- Lean Protein
Chicken is a fantastic source of lean protein, which is essential for muscle repair, maintaining energy levels, and supporting a healthy immune system. Choosing skinless chicken breast, as we do in this recipe, helps keep the fat content lower while still delivering the protein your body needs. - Vitamin B6
Chicken is rich in vitamin B6, which plays a crucial role in brain health, hormone regulation, and even the formation of red blood cells. A serving of chicken tenders can give you a good portion of your daily B6 intake. - Customizable to Dietary Needs
By making your own chicken tenders, you can control what goes into them, from the breading to the seasoning. You can easily make them gluten-free by using almond flour or a gluten-free breadcrumb alternative. You can also adjust the seasonings to suit dietary preferences, such as low-sodium or dairy-free options.
That said, like any comfort food, it’s important to enjoy chicken tenders in moderation. But when you make them from scratch, they’re definitely a healthier option compared to fast food varieties.
Frequently Asked Questions (FAQs)
- Can I use chicken thighs instead of breasts for tenders?
Absolutely! While chicken breasts are typically used for tenders because of their lean nature, chicken thighs can also work well. They’re juicier and have a bit more flavor, so if you like a richer taste, go ahead and use thighs. Just keep in mind that they might need a bit more time to cook through. - How can I make my tenders extra crispy?
For extra crispy tenders, be sure to double-bread them. After dipping the chicken in the egg wash and breadcrumbs, dip them again in the egg wash and breadcrumbs. This creates a thicker crust that will fry up beautifully. Also, ensure the oil is hot enough (around 350°F/175°C) so the tenders crisp up quickly and don’t soak up too much oil. - Can I bake the tenders instead of frying them?
Yes! If you prefer a healthier option, you can bake the tenders in the oven at 400°F (200°C) for about 20 minutes, flipping halfway through. For the crispiest results, spray them lightly with cooking spray before baking. - Can I freeze raw chicken tenders?
Yes, you can freeze raw, breaded chicken tenders. Lay them out on a baking sheet to freeze them individually, then transfer to a freezer-safe bag or container. When you’re ready to cook, just bake or fry them directly from the freezer, but be sure to add a few extra minutes to the cooking time.
In the end, this chicken tender recipe isn’t just about making a meal—it’s about creating something that brings joy, warmth, and comfort. Whether you’re feeding your family, enjoying a solo dinner, or hosting a gathering, chicken tenders have that magical way of making everyone feel at home. It’s a timeless recipe, with endless possibilities for variation, and most importantly, it’s made with love. Enjoy every crispy, tender bite!