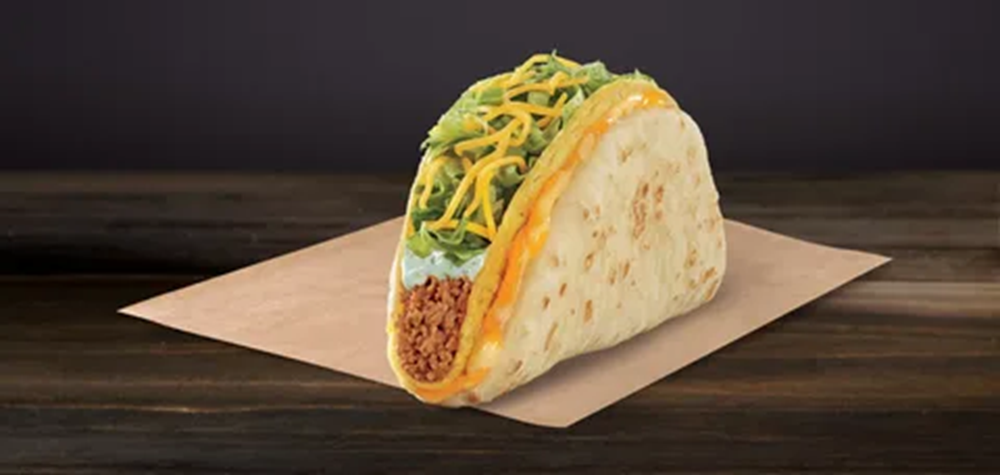
There’s something magical about the contrast between soft and crunchy textures in a single bite, and the Cheesy Gordita Crunch is the ultimate example of that. Inspired by the beloved fast-food classic, this homemade version brings the same irresistible combination of warm, cheesy flatbread wrapped around a crispy taco shell—only better, fresher, and customizable to your taste.
Why I Love This Recipe?
I have a deep, nostalgic connection to the Cheesy Gordita Crunch. I remember late-night taco runs with friends, where laughter filled the car as we unwrapped our favorite indulgence. That first bite—soft, warm flatbread giving way to a perfectly crunchy shell, all held together by a luscious layer of melted cheese—was pure comfort.
Bringing that experience into my own kitchen was a game-changer. Not only do I get to enjoy this masterpiece whenever I want, but I can also tweak it to be even more flavorful, fresh, and satisfying. Plus, the process of making it at home is surprisingly simple and fun, especially when I get to experiment with different cheeses, sauces, and fillings.
Cheesy gordita crunch recipe
Equipment
- Skillet or Pan
- Oven or Stovetop
- Tongs or spatula
- Mixing bowls
- Cheese Grater
Ingredients
- 1 lb ground beef
- 1 teaspoon salt
- 1 teaspoon black pepper
- 1 teaspoon chili powder
- 1 teaspoon cumin
- ½ teaspoon paprika
- ½ teaspoon garlic powder
- ½ teaspoon onion powder
- ¼ teaspoon cayenne pepper
- ¼ cup water
For the Cheesy Gordita Crunch:
- 4 soft flour tortillas
- 4 crunchy taco shells
- 1 cup shredded cheddar cheese
- ½ cup shredded Monterey Jack cheese
- ½ cup sour cream
- ½ cup taco sauce
- ½ cup shredded lettuce
- ¼ cup diced tomatoes
- ¼ cup shredded mozzarella
Instructions
- Step 1: Prepare the Taco MeatHeat a skillet over medium heat. Add the ground beef and cook for 5–7 minutes, breaking it apart with a spatula.Once browned, drain any excess grease.Stir in salt, pepper, chili powder, cumin, paprika, garlic powder, onion powder, and cayenne pepper.Add ¼ cup of water, stir well, and let it simmer for another 3–4 minutes until the liquid evaporates.
- Step 2: Prepare the Cheesy LayerHeat a dry skillet over medium heat. Place a soft flour tortilla on the skillet and sprinkle about ¼ cup of cheddar and Monterey Jack cheese on top.Let it melt slightly for about 1 minute.Immediately press a crunchy taco shell onto the melted cheese so it sticks. Remove from the heat. Repeat with all tortillas.
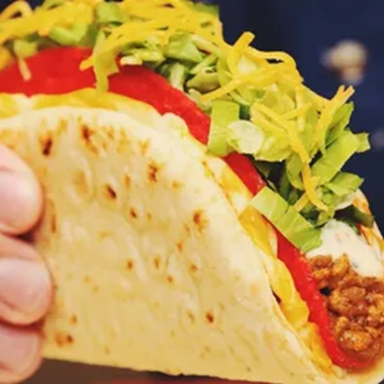
- Step 3: Assemble the Gordita CrunchSpread 1 tablespoon of taco sauce inside each crunchy taco shell.Add about ¼ cup of cooked taco meat into each shell.Top with shredded lettuce, diced tomatoes, and a sprinkle of extra cheese.Drizzle with sour cream or your favorite sauce.
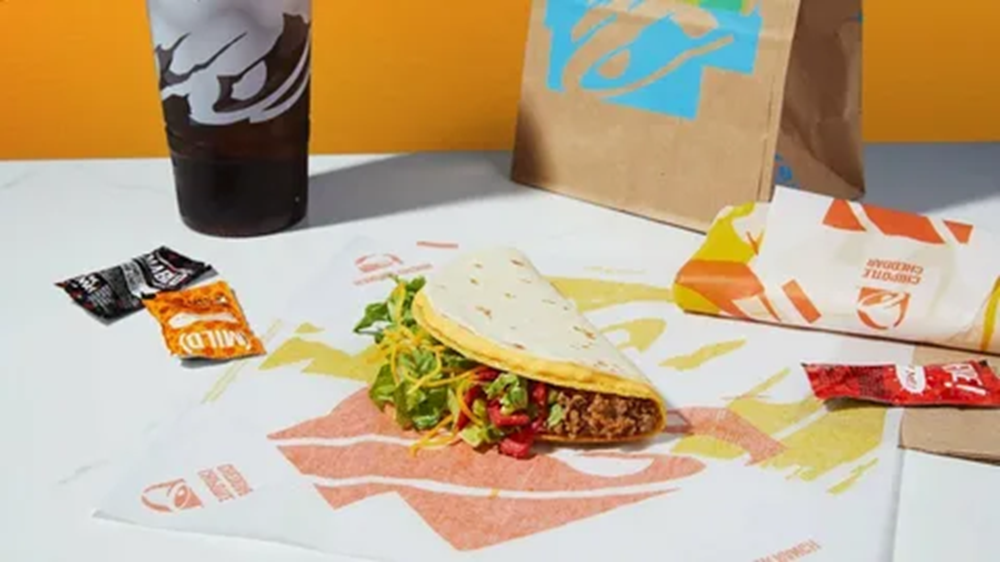
- Step 4: Serve and Enjoy!Your homemade Cheesy Gordita Crunch is ready! Serve immediately for the best texture.
Related Video
Notes
- Use Freshly Grated Cheese – Pre-shredded cheese contains anti-caking agents, which can affect how well it melts. Freshly grated cheese will give you that smooth, gooey texture.
- Press the Crunchy Shell Firmly – After melting the cheese on the tortilla, press the crunchy taco shell down firmly so it sticks well. This helps hold everything together.
- Warm the Taco Shells Before Assembling – Heating crunchy shells in the oven for 3 minutes at 350°F (175°C) makes them crispier and prevents them from breaking too easily.
- Double the Cheese for Extra Flavor – If you’re a cheese lover, try adding an extra layer of melted mozzarella between the tortilla and shell for an even cheesier bite.
- Customize the Sauce – The taco sauce is key! If you like spice, mix a little hot sauce with sour cream or use a creamy jalapeño sauce for a bold kick.
Nutrition
Serving Suggestions for cheesy gordita crunch
The Cheesy Gordita Crunch is a standout on its own, but pairing it with the right sides and toppings can elevate the experience even more. Here are some delicious ways to serve it:
- With a Zesty Avocado Lime Crema – A creamy, tangy avocado sauce drizzled over the taco adds a refreshing contrast to the rich, cheesy layers. The smooth texture plays beautifully with the crunch of the shell.
- Paired with Mexican Street Corn (Elote) – Sweet, charred corn slathered in cotija cheese, mayo, lime, and chili powder is the perfect sidekick to the bold flavors of the Gordita Crunch. It’s messy, it’s indulgent, and it’s absolutely worth it.
- With a Side of Spicy Chipotle Rice – A lightly spiced rice dish with smoky chipotle and fresh cilantro makes for a great balance to the cheesiness of the main dish. The heat level is easily adjustable, so you can make it mild or fiery.
No matter how you serve it, this dish is all about indulgence, fun, and flavor-packed bites.
Try this also : The Perfect Sauce pan Recipe
Variations of cheesy gordita crunch
One of the best things about making the Cheesy Gordita Crunch at home is the ability to experiment with flavors and ingredients. Here are some creative twists to keep things exciting:
- Buffalo Chicken Twist – Swap out the seasoned ground beef for shredded buffalo chicken, and replace the taco sauce with a drizzle of ranch or blue cheese dressing. The spice from the buffalo sauce adds a bold, tangy kick.
- Vegetarian Black Bean & Sweet Potato – A hearty, smoky black bean and roasted sweet potato filling makes for an incredibly satisfying meat-free version. Add a dollop of creamy chipotle sauce for extra depth.
- Korean-Inspired Bulgogi Beef – For a fusion twist, marinate thinly sliced beef in a sweet and savory bulgogi sauce, then use it as the filling. Top with pickled veggies and a drizzle of spicy gochujang mayo.
The possibilities are endless, and that’s what makes this recipe so much fun—it’s a blank canvas for bold, creative flavors!
Storage & Shelf Life of cheesy gordita crunch
If you somehow end up with leftovers (which rarely happens in my house), here’s how to store them properly:
- Tortillas and Hard Shells – Store the soft flatbreads and crispy taco shells separately in airtight containers. The flatbreads stay fresh for about 4–5 days at room temperature, while hard shells can last up to two weeks.
- Meat Filling – Keep any leftover taco meat in an airtight container in the fridge for up to 3 days. Reheat in a skillet over medium heat for the best texture.
- Assembled Gorditas – These are best enjoyed fresh, but if needed, store them wrapped in foil in the fridge for up to 24 hours. Reheat in the oven at 350°F for about 10 minutes to restore some of the crunch.
- Cheese & Toppings – Keep shredded cheese and sauces in the fridge, but assemble everything just before eating for the best taste and texture.
A little planning goes a long way in keeping your Cheesy Gordita Crunch as fresh and delicious as possible!
Health Benefits of cheesy gordita crunch
While the Cheesy Gordita Crunch is definitely an indulgence, there are ways to make it a bit healthier without sacrificing flavor. Here are some nutritional perks you can incorporate:
- High-Protein Option : Using lean ground turkey or plant-based crumbles instead of beef can reduce saturated fat while still keeping the dish satisfying and protein-packed.
- Fiber Boost : Swapping out white flour tortillas for whole wheat or using fiber-rich fillings like black beans and avocado can add extra gut-friendly benefits.
- Healthy Fats :Adding heart-healthy fats like avocado or Greek yogurt-based sauces can balance out the richness while providing essential nutrients.
- Lower Sodium Choices : Making your own taco seasoning at home can help control sodium intake while still delivering bold, spicy flavors.
With a few small tweaks, you can enjoy this classic while feeling good about what you’re eating!
Frequently Asked Questions (FAQs)
Q: Can I make this ahead of time?
A: Yes! You can prep the meat, shred the cheese, and have everything ready to assemble when it’s time to eat. However, the final assembly should be done fresh for the best texture.
Q: What’s the best cheese to use?
A: A blend of cheddar and Monterey Jack works best, but you can also experiment with pepper jack for extra spice or mozzarella for an extra stretchy melt.
Q: Can I make this gluten-free?
A: Absolutely! Use gluten-free soft tortillas and hard taco shells, and double-check your seasonings to ensure they don’t contain hidden gluten.
Q: How do I get the shells to stick together perfectly?
A: The key is melting the cheese between the soft tortilla and the crunchy shell—use a skillet or oven to warm everything together for a seamless bite.
The Cheesy Gordita Crunch is more than just a taco—it’s a full-on sensory experience. The combination of textures, flavors, and customizable options makes it a go-to favorite, whether you’re recreating a nostalgic fast-food memory or crafting something entirely your own.