Ezekiel bread isn’t just a bread recipe—it’s a journey through time. Named after the prophet Ezekiel from the Bible, this ancient bread is made from sprouted whole grains and legumes, offering a healthier alternative to modern bread. Its origins are believed to be in the Middle East, and it’s been part of human diets for centuries. The sprouting process used to make this bread was a revolutionary method of preparing grains that made them more digestible and nutrient-dense. Today, Ezekiel bread continues to captivate those who are looking for a bread that’s rich in flavor, history, and health benefits.

Why I Love This Recipe?
For me, baking Ezekiel bread isn’t just about following a recipe—it’s about connecting with something deeply rooted in history. The moment you bite into a slice of this hearty, nutty bread, you’re reminded of the wisdom of ancient cultures who valued whole, nutritious foods. The flavors are so rich and complex, with a slight sweetness and a satisfying chew. It’s the kind of bread that makes you feel good about what you’re eating, not just because it’s healthy, but because it carries with it stories of survival and tradition.
Making Ezekiel bread from scratch is a labor of love, but it’s well worth the effort. Unlike store-bought bread, which often feels airy and light, this bread is dense, packed with nutrients, and full of texture. I love how the sprouted grains give it a unique earthy flavor, complemented by a subtle sweetness. And let’s not forget the sense of accomplishment when you pull that perfectly baked loaf out of the oven—it’s like holding a piece of history in your hands.
Ezekiel bread Recipe
Equipment
- Large mixing bowl
- Bread pan
- Strainer or colander
- Clean kitchen towel or cheesecloth
- Oven
- Measuring cups and spoons
Ingredients
- 1 cup wheat berries
- ½ cup spelt berries
- ½ cup barley
- ½ cup lentils
- ¼ cup chickpeas
- ¼ cup water
- 1 tablespoon honey
- 1 ½ teaspoons salt
- ¼ teaspoon ground cinnamon
- 1 tablespoon olive oil
- ¼ cup warm water
- 2 teaspoons active dry yeast
Instructions
Sprouting the Grains and Legumes:
- Rinse all the grains and legumes thoroughly. Place them in separate bowls and cover with water. Let them soak for 8-12 hours or overnight.
- After soaking, drain the water and place the grains and legumes in a colander or strainer. Cover with a clean kitchen towel or cheesecloth, and allow them to sprout for 12-16 hours, rinsing them every 8 hours.
Prepare the Dough:
- Once the grains and legumes have sprouted, blend them in a food processor or high-speed blender until a thick, sticky dough forms. Add water gradually if necessary to help the process.
- In a large mixing bowl, combine the sprouted grain mixture, honey, salt, cinnamon, and olive oil. Mix everything together, then add the warm water to activate the yeast.
- Sprinkle the yeast over the dough and let it sit for about 10-15 minutes until the yeast begins to foam.
Knead and Rise:
- Knead the dough on a floured surface for about 5-10 minutes, until it becomes smooth and elastic.
- Shape the dough into a loaf and place it in a greased bread pan. Cover the pan with a kitchen towel and let the dough rise for about 1-2 hours, or until it doubles in size.
Bake:
- Preheat your oven to 375°F (190°C). Once the dough has risen, place the bread pan in the oven and bake for 45-60 minutes, or until the bread sounds hollow when tapped on the bottom and has a golden-brown crust.
- Let the bread cool on a wire rack before slicing.
Related Video
Notes
- Sprout the Grains Well: Ensure the grains and legumes have fully sprouted before using them. Under-sprouted grains can affect the bread’s texture and taste.
- Add Variety: Experiment with different legumes, like peas or mung beans, for unique flavors.
- Watch the Rise Time: Be patient with the rising time. If your kitchen is cold, consider placing the dough in a warm area (like near the oven) to help it rise properly.
- Don’t Skip the Cooling: Let the bread cool completely before slicing to avoid it becoming too doughy or soggy.
- Use Fresh Yeast: Always check the expiration date on your yeast. Fresh yeast will help the bread rise better and give you a lighter texture.
Nutrition
4 Serving Suggestions for Ezekiel Bread
Ezekiel bread is incredibly versatile, and whether you’re enjoying it for breakfast, lunch, or dinner, there’s always a perfect way to enjoy a slice. Here are four of my favorite ways to serve it:
- Classic Avocado Toast
A slice of Ezekiel bread, lightly toasted, topped with mashed avocado, a squeeze of lemon, and a sprinkle of sea salt—this is the perfect breakfast or snack. The nutty flavor of the bread complements the creamy avocado so beautifully, creating a balance of textures that will leave you craving more. - Grilled Cheese with a Twist
There’s something about Ezekiel bread that takes a classic grilled cheese sandwich to the next level. The bread holds up perfectly to the melting cheese, adding a depth of flavor that regular white bread just can’t match. Add some caramelized onions or tomato slices for an extra burst of flavor. - Ezekiel Bread Croutons for Salads
If you’re looking for a crunchy topping to elevate your salad, Ezekiel bread croutons are a game-changer. Simply cube the bread, toss with olive oil, herbs, and a pinch of salt, then bake until crispy. These croutons add a hearty, nutty flavor to any salad, making it more filling and satisfying. - Peanut Butter & Banana Toast
For a wholesome snack or quick breakfast, spread a generous layer of peanut butter on a slice of Ezekiel bread, then top with banana slices. The bread’s texture pairs wonderfully with the creamy peanut butter, and the bananas add a touch of natural sweetness. It’s simple, filling, and delicious.
These serving suggestions are just a starting point—Ezekiel bread is so versatile that the possibilities are endless. Whether you’re pairing it with savory toppings or indulging in sweet spreads, it’s a bread that will always surprise you.
Try this also : Ultimate Smoked Mac and Cheese Recipe
Variations of Ezekiel Bread
While the traditional Ezekiel bread recipe is already fantastic, you can always tweak it to fit your flavor preferences or dietary needs. Here are a few variations to try:
- Cinnamon Raisin Ezekiel-Bread
If you love the sweet and spicy aroma of cinnamon, adding ground cinnamon and raisins to your Ezekiel bread dough can create a warm, comforting variation. It’s perfect for breakfast or as a sweet snack. - Herb-Infused Ezekiel-Bread
For a savory twist, consider adding fresh herbs like rosemary, thyme, or garlic to your dough. The herbs infuse the bread with a fragrant, earthy flavor that pairs wonderfully with soups, stews, or even a cheese platter. - Ezekiel Bread with-Seeds
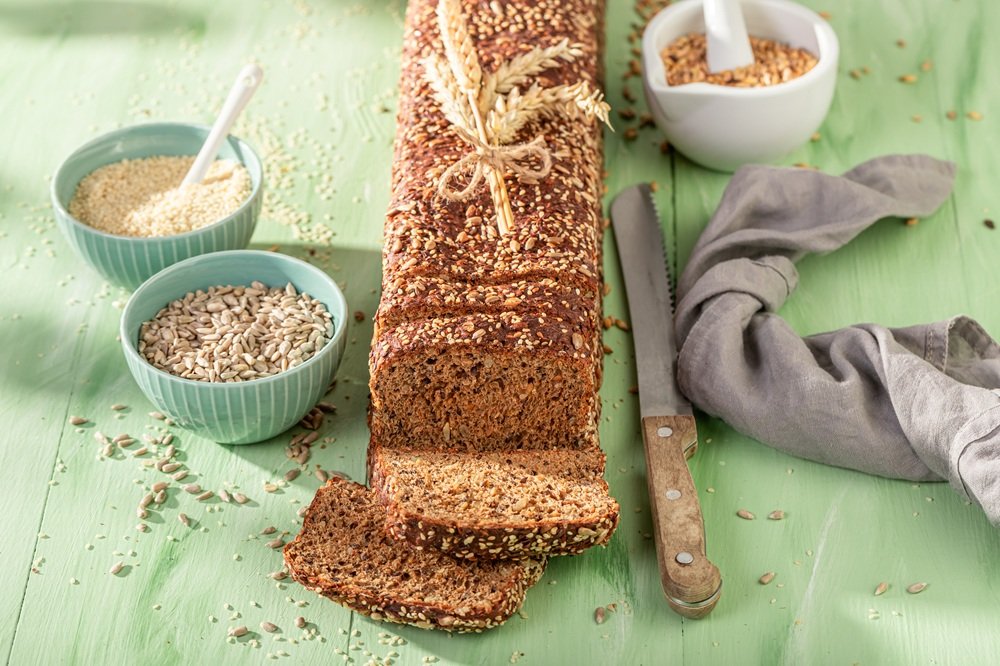
Add texture and crunch by sprinkling sunflower seeds, chia seeds, or sesame seeds into the dough before baking. These seeds not only enhance the flavor but also boost the nutritional content, making your bread even more wholesome. - Gluten-Free Ezekiel-Bread
If you’re following a gluten-free diet, you can adapt the Ezekiel bread recipe by using gluten-free grains like quinoa or buckwheat. The bread will still have that beautiful, nutty flavor, and it will be entirely gluten-free, perfect for those with dietary restrictions.
Feel free to experiment with these variations, or come up with your own unique twists. Ezekiel bread is flexible and forgiving, so it’s easy to make it your own.
Storage and Shelf Life of Ezekiel Bread
Ezekiel bread is made with whole grains and legumes, so it’s slightly different from typical store-bought bread in terms of storage. Here’s how to keep it fresh:
- At Room Temperature: If you plan on eating the bread within a few days, you can store it in an airtight container or a bread bag at room temperature. It will last for about 2-3 days before beginning to lose its freshness.
- Freezing: To extend the shelf life, slice the bread and freeze individual slices in a ziplock bag. When you want to enjoy a slice, simply toast it straight from the freezer. This method preserves the bread for up to 3 months.
- Refrigeration: Although refrigeration can help extend the shelf life, it can also cause the bread to dry out faster. If you’re not planning to eat it immediately, freezing is the best option.
- Note: Homemade Ezekiel bread doesn’t contain preservatives, so it’s best enjoyed within the first few days of baking. But with freezing, you can always have some on hand for when the craving strikes.
In short, with proper storage—whether at room temperature, frozen, or refrigerated—you can enjoy Ezekiel bread at its best for days to come.
Health Benefits of Ezekiel Bread
Ezekiel-bread is more than just a tasty loaf—it’s a nutritional powerhouse. Here are some of the key health benefits:
- High in Protein: Thanks to the combination of sprouted grains and legumes, Ezekiel bread is a complete protein, meaning it contains all nine essential amino acids. This makes it an excellent choice for vegetarians and those looking to increase their protein intake.
- Rich in Fiber: The sprouting process increases the bread’s fiber content, which helps support digestive health. Fiber also promotes feelings of fullness, making Ezekiel bread a great option for those looking to manage their weight.
- Low Glycemic Index: Unlike many refined breads, Ezekiel bread has a low glycemic index, which means it won’t cause sharp spikes in blood sugar. This makes it a better option for people with diabetes or those looking to maintain stable energy levels throughout the day.
- Packed with Nutrients: Ezekiel bread is full of vitamins and minerals, including folate, iron, magnesium, and zinc. These nutrients are essential for maintaining overall health, supporting immune function, and boosting energy levels.
Incorporating Ezekiel bread into your diet is a simple way to boost your intake of whole, nutrient-dense foods. Plus, it’s so delicious that you won’t even realize how good it is for you.
FAQs) about Ezekiel Bread
Q: Can I make Ezekiel-bread without sprouting the grains?
A: Sprouting the grains is an essential step in making Ezekiel bread. It increases the nutritional value and makes the grains easier to digest. However, you can skip the sprouting process if you’re short on time, though the bread will not have the same texture or health benefits.
Q: Is Ezekiel-bread gluten-free?
A: Traditional Ezekiel bread contains wheat, so it’s not gluten-free. However, you can make a gluten-free version by substituting the wheat with other gluten-free grains like quinoa or buckwheat.
Q: Can I use a bread machine to make Ezekiel-bread?
A: Yes, you can use a bread machine to make Ezekiel bread, but it’s important to follow the specific instructions for your bread machine model. Keep in mind that the sprouting process must still be done manually before adding the ingredients to the machine.
Q: How long will Ezekiel-bread last?
A: Homemade Ezekiel bread typically lasts 2-3 days at room temperature. You can extend its shelf life by freezing it. Sliced bread can last up to 3 months in the freezer.
Making Ezekiel bread is an experience—both in the kitchen and on your taste buds. It’s a slice of history, packed with nutrition and flavor, and a testament to the power of simple, whole foods. Whether you’re baking it for the first time or have made it a weekly ritual, this bread is a reminder that sometimes, the most nourishing things come from ancient traditions passed down through generations.