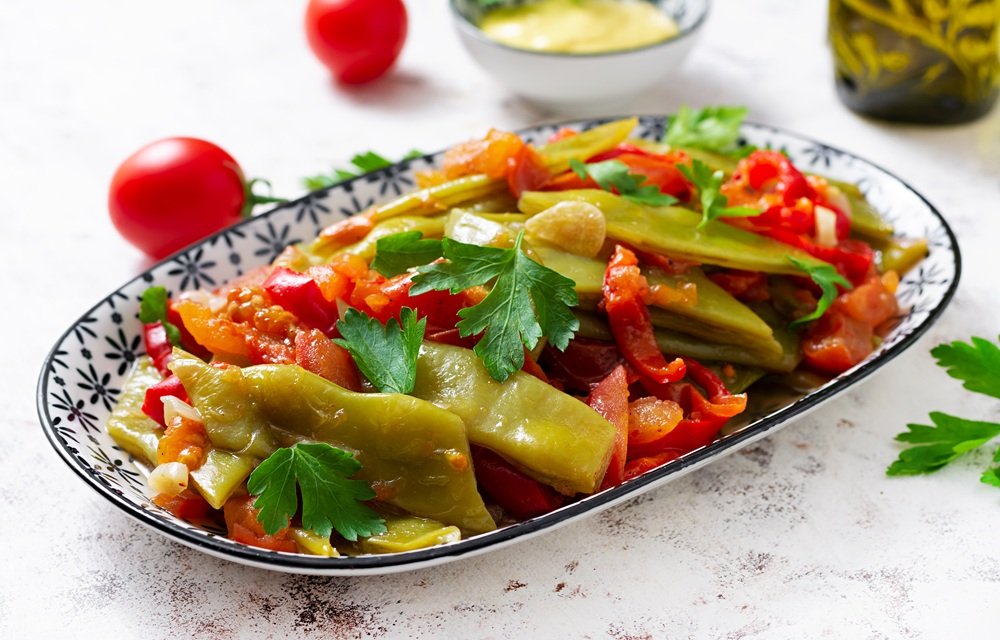
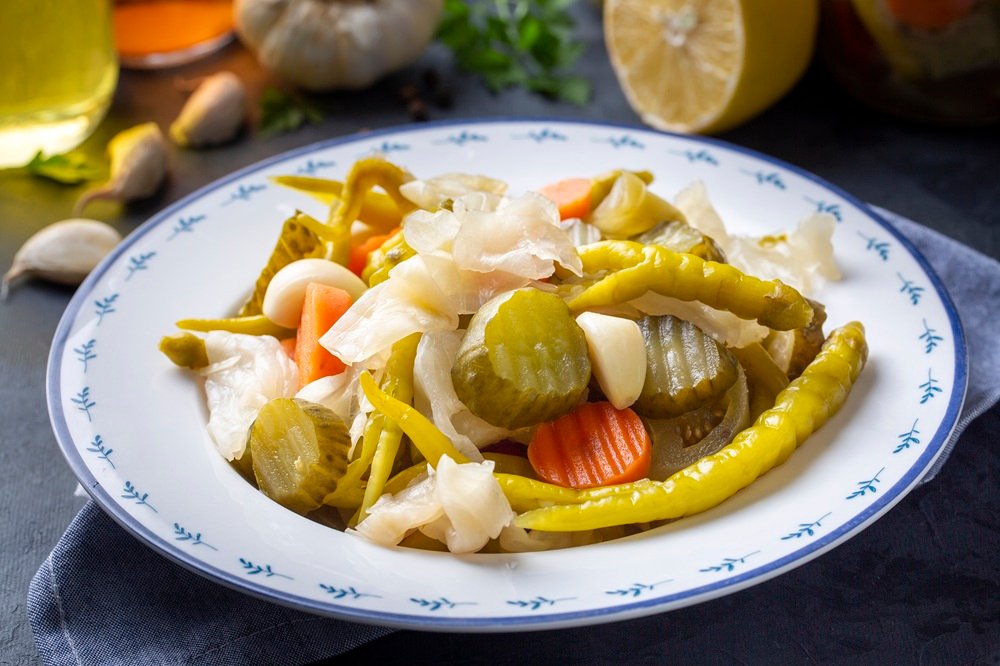
Giardiniera is a zesty, crunchy pickled vegetable medley that’s as versatile as it is delicious. This Italian staple, often found accompanying antipasto platters or adorning sandwiches, brings a burst of tangy flavor and a satisfying texture. Originating in Italy, this dish has made its way across the globe, with regional variations in Chicago, Sicily, and beyond. But no matter where you encounter it, giardiniera never fails to elevate any meal with its bold, briny charm.
Why I Love This Recipe?
There’s something magical about the way giardiniera brings a sense of vibrancy and contrast to any table. For me, it’s not just about the flavor—though that’s a big part of it—but also the nostalgia. I remember my grandmother, an Italian immigrant, making large batches of giardiniera every fall, when fresh vegetables were abundant in the garden. The kitchen would be filled with the rich aroma of vinegar, garlic, and spices. She’d meticulously pack the vegetables into jars, sealing each one with care, as if preserving a piece of summer in each bite.
What I love most about making giardiniera now is how it keeps those cherished memories alive. It’s a reminder of family, tradition, and the simple joys of cooking. There’s a unique pleasure in opening a jar, revealing the colorful mix of vegetables, and knowing that each crunch is tied to both history and love. It’s more than just a recipe—it’s a bridge between generations.
Giardiniera Recipe
Equipment
- Large jar or mason jars
- Cutting board and knife
- Large mixing bowl
- Measuring spoons and cups
- A saucepan for the brine
- A spoon for stirring
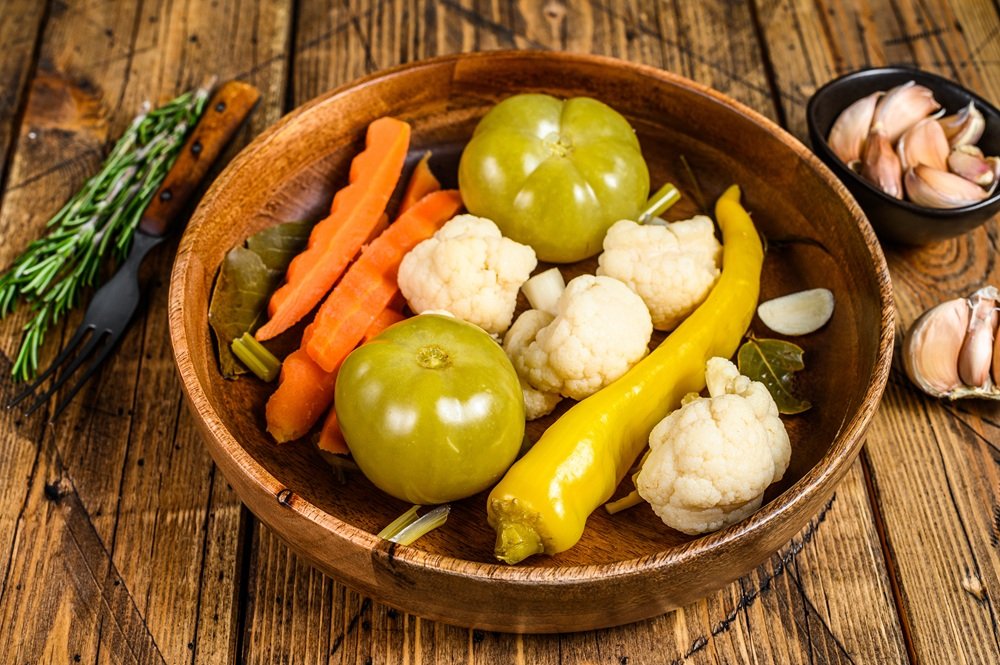
Ingredients
- 1 cup cauliflower florets
- 1 cup carrots
- 1 cup celery
- 1 cup green bell pepper
- 1/2 cup red bell pepper
- 1/2 cup onion
- 2 cloves garlic
- 2 hot peppers
- 1 1/2 cups white vinegar
- 1 cup water
- 2 tbsp salt
- 1 tbsp sugar
- 1 tbsp dried oregano
- 1 tsp mustard seeds
- 1 tsp black peppercorns
- 1/2 tsp celery seeds
- 1 bay leaf
Instructions
- Prepare the Vegetables: Wash and peel the vegetables as necessary. Slice the carrots, celery, peppers, and onion into bite-sized pieces. Separate the cauliflower into small florets. If using, slice the hot peppers into thin rounds. Mince the garlic.
- Sterilize the Jars: Before starting, sterilize your jars by placing them in boiling water for 5-10 minutes, then allowing them to dry completely.
- Prepare the Brine: In a medium saucepan, combine the white vinegar, water, salt, sugar (if using), oregano, mustard seeds, black peppercorns, celery seeds, and bay leaf. Bring the mixture to a boil, stirring until the salt and sugar have dissolved. Once boiling, reduce the heat and simmer for 5 minutes to allow the flavors to meld together.
- Pack the Vegetables: Layer the prepared vegetables into the sterilized jars, packing them tightly but not too tightly to allow for expansion. Add minced garlic and optional hot peppers between the layers.
- Pour the Brine: Carefully pour the hot brine over the vegetables in the jars, ensuring they are completely submerged. Leave about 1/2-inch space at the top of the jar.
- Seal the Jars: Wipe the rims of the jars with a clean cloth and seal with the lids. Allow the jars to cool to room temperature before refrigerating.
- Marinate: Let the giardiniera sit in the refrigerator for at least 24 hours before eating to allow the flavors to fully develop. It’s even better if allowed to marinate for 3-4 days.
Related Video
Notes
Nutrition
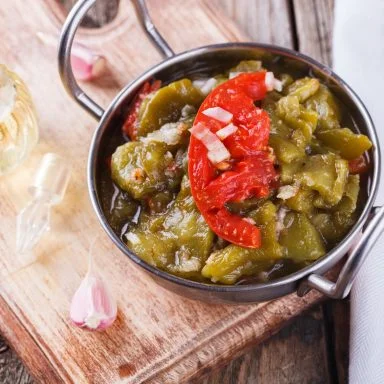
Serving Suggestions for Giardiniera
This recipe isn’t just a side dish; it’s a versatile companion that can elevate almost any meal. If you’ve never considered how to use it beyond a simple snack, here are a few ideas to inspire you:
- As a Sandwich Topping
There’s nothing like the satisfying crunch of giardiniera added to a sandwich. Whether you’re building a classic Italian sub or a hearty roast beef sandwich, a few spoonfuls of this pickled goodness adds an irresistible zing that balances the richness of the meat. The tangy marinade and crisp vegetables bring a refreshing contrast to the tender bread and filling. - On a Charcuterie Board
This recipe is a beautiful addition to any antipasto or charcuterie platter. It adds not only color but flavor—perfectly complementing cured meats, cheeses, and olives. Serve it alongside your favorite salami, some fresh bread, and a bit of sharp cheese, and you’ll have a crowd-pleasing spread. - As a Side for Grilled Meats
Grilled meats, especially those with smoky or charred notes, pair exceptionally well with the crisp acidity of giardiniera. Think of a smoky grilled sausage, a juicy steak, or even barbecue chicken—each bite is heightened by the tangy, crunchy vegetables that accompany it. It’s a perfect side that cuts through the richness of grilled foods. - Mixed into Pasta Salads
This recipe adds a burst of flavor to any pasta salad. Whether you’re making a classic Italian pasta salad or a creamy version with mayonnaise, a few spoonfuls of giardiniera can infuse your dish with vibrant color and a delicious pop of flavor. It’s a fantastic way to bring a little extra excitement to a cold salad at your next picnic or potluck.
This recipe adaptability is part of what makes it so special. No matter how you choose to serve it, it’s bound to be a hit. The freshness and boldness it provides will undoubtedly take your meals to the next level.
Try this also :The Ultimate Chicken Wings Recipe
Variations of Giardiniera
While the classic recipe is a true Italian favorite, there are many creative ways to make this dish your own. Here are a few variations to consider:
- Chicago-Style Giardiniera
Chicago-style giardiniera has a bit of a kick to it. In this variation, you add hot peppers like serrano or jalapeño to the mix, giving it a spicy edge. This version is perfect for those who like a little heat with their tang. It’s especially great on Italian beef sandwiches or as a topping for pizza. - Sweet Giardiniera
For those who prefer a milder taste, sweet giardiniera is a wonderful alternative. This version incorporates sugar into the brine, balancing out the vinegar’s acidity with a touch of sweetness. It pairs beautifully with cheese platters or alongside a plate of antipasti, offering a delicate contrast to the savory elements. - Green Bean Giardiniera
Incorporating green beans into your giardiniera recipe adds a unique twist. The beans retain their snap even after pickling, offering a fresh crunch alongside the other vegetables. This variation is perfect for those who want a different texture while still enjoying the bright, tangy flavors of giardiniera. - Vegan Giardiniera
For a completely plant-based twist, consider making a vegan giardiniera. Skip the anchovies often used in the brine and focus on the vegetables. You can still achieve that signature flavor by using a blend of vinegar, garlic, and herbs, creating a deliciously tangy mix that everyone can enjoy, regardless of dietary preferences.
Each of these variations allows you to personalize the recipe to suit your tastes or cater to specific dietary needs. Giardiniera is endlessly customizable, so don’t hesitate to experiment with different vegetables or flavor profiles.
Storage and Shelf Life of Giardiniera
Once you’ve made your giardiniera, the next question is: how do you store it? Fortunately, this recipe keeps well for months, which is one of the reasons I love making big batches. Here are some tips on storage and shelf life:
- Refrigeration
Once the giardiniera is jarred and sealed, it should be refrigerated to preserve its freshness. It’s best to let it sit for at least 24 hours to allow the flavors to develop fully, but it will continue to improve over time. You can expect your giardiniera to stay fresh in the fridge for up to 3 months, though the flavors will intensify the longer it sits. - Sealing in Jars
For long-term storage, make sure your giardiniera is sealed tightly in sterilized jars. If you want to extend the shelf life even further, you can process the jars in a hot water bath for 10-15 minutes to ensure a proper seal. This way, your giardiniera can last for up to a year in your pantry. - Check for Signs of Spoilage
Before using, always check your giardiniera for signs of spoilage. If you notice any mold, unusual odors, or significant changes in color, it’s best to discard the jar. Otherwise, you’re good to go! - Ideal Temperature
Store your giardiniera at a cool, consistent temperature. Avoid placing it in direct sunlight or areas where the temperature fluctuates too much, as this can affect its flavor and texture.
With proper storage, you can enjoy your homemade dish for months to come, making it a perfect recipe for meal prep or holiday gifting.
Health Benefits of Giardiniera
While this dish is often enjoyed for its bold, tangy flavor, it also offers several health benefits, making it a great addition to a balanced diet.
- Rich in Fiber
The vegetables in giardiniera—such as carrots, cauliflower, and bell peppers—are excellent sources of dietary fiber. Fiber is essential for digestive health, helping to keep things moving smoothly and preventing constipation. - Low in Calories
If you’re watching your calorie intake, giardiniera is a great snack or side dish to add to your meals. It’s low in calories but high in flavor, allowing you to enjoy a tasty addition to your plate without overloading on calories. - Packed with Antioxidants
The fresh vegetables in giardiniera are rich in antioxidants, which can help protect the body from oxidative stress and inflammation. Antioxidants support overall health and may reduce the risk of chronic diseases like heart disease and cancer. - Probiotic Benefits
Because it is pickled, it contains beneficial probiotics that can help support gut health. These probiotics can aid in digestion and boost your immune system, making thuis recipe not just a flavorful condiment, but a healthy one too.
This dish is a delicious way to add more nutrients to your diet while enjoying a burst of bold flavors.
Frequently Asked Questions (FAQs)
1. Can I use other vegetables in giardiniera?
Absolutely! Giardiniera is highly customizable. While the classic version often includes carrots, cauliflower, and peppers, you can add or substitute vegetables like zucchini, celery, or even onions for a unique twist.
2. Can I make giardiniera spicy?
Yes, you can! If you love heat, adding hot peppers like jalapeños or serranos is a great way to give your giardiniera an extra kick. Adjust the amount of peppers to suit your taste.
3. How long does it take for giardiniera to pickle?
This recipe usually needs at least 24 hours to fully marinate in its brine, but the flavors will continue to develop and deepen over time. It’s best to wait a few days before enjoying it for the fullest flavor.
4. Can I freeze giardiniera?
Freezing giardiniera isn’t recommended as it can affect the texture of the vegetables. It’s best enjoyed fresh and stored in the refrigerator for optimal flavor and crunch.
This recipe is a timeless recipe that’s as much about tradition and family as it is about flavor. It’s a dish that brings people together, whether on a sandwich, a charcuterie board, or as a tangy side to your favorite meal. Enjoy making your own version and savor the memories it creates!